Restaurant and tables
Everything a table-service business needs: see the dining room at a glance, take the order, send it to the kitchen, and collect payment.
Here’s the full cycle:
The dining room shows the status of each table
Free, occupied, bill requested, in preparation, ready to serve.
The waiter taps a table and takes the order
That table’s order opens and the products get added.
The order reaches the kitchen
It shows up on the kitchen monitor, with a sound and its timer.
The kitchen marks it READY
The table shows a bell, and the waiter knows the dish can be picked up.
The bill gets paid
From the same table, with the option to split the bill.
The module’s screens
| Screen | What it’s for |
|---|---|
| Dining room | The day’s board: every table and its status, as a floor plan or a list |
| Kitchen monitor | The screen that sits in the kitchen or the bar: what to prepare and marking it ready |
| Design the dining room | Set up the areas and place the tables where they really sit |
| Preparation stations | Decide what’s prepared in the kitchen and what’s prepared at the bar |
| Modifiers | “No onion,” “extra cheese,” choosing a sauce |
The dining room
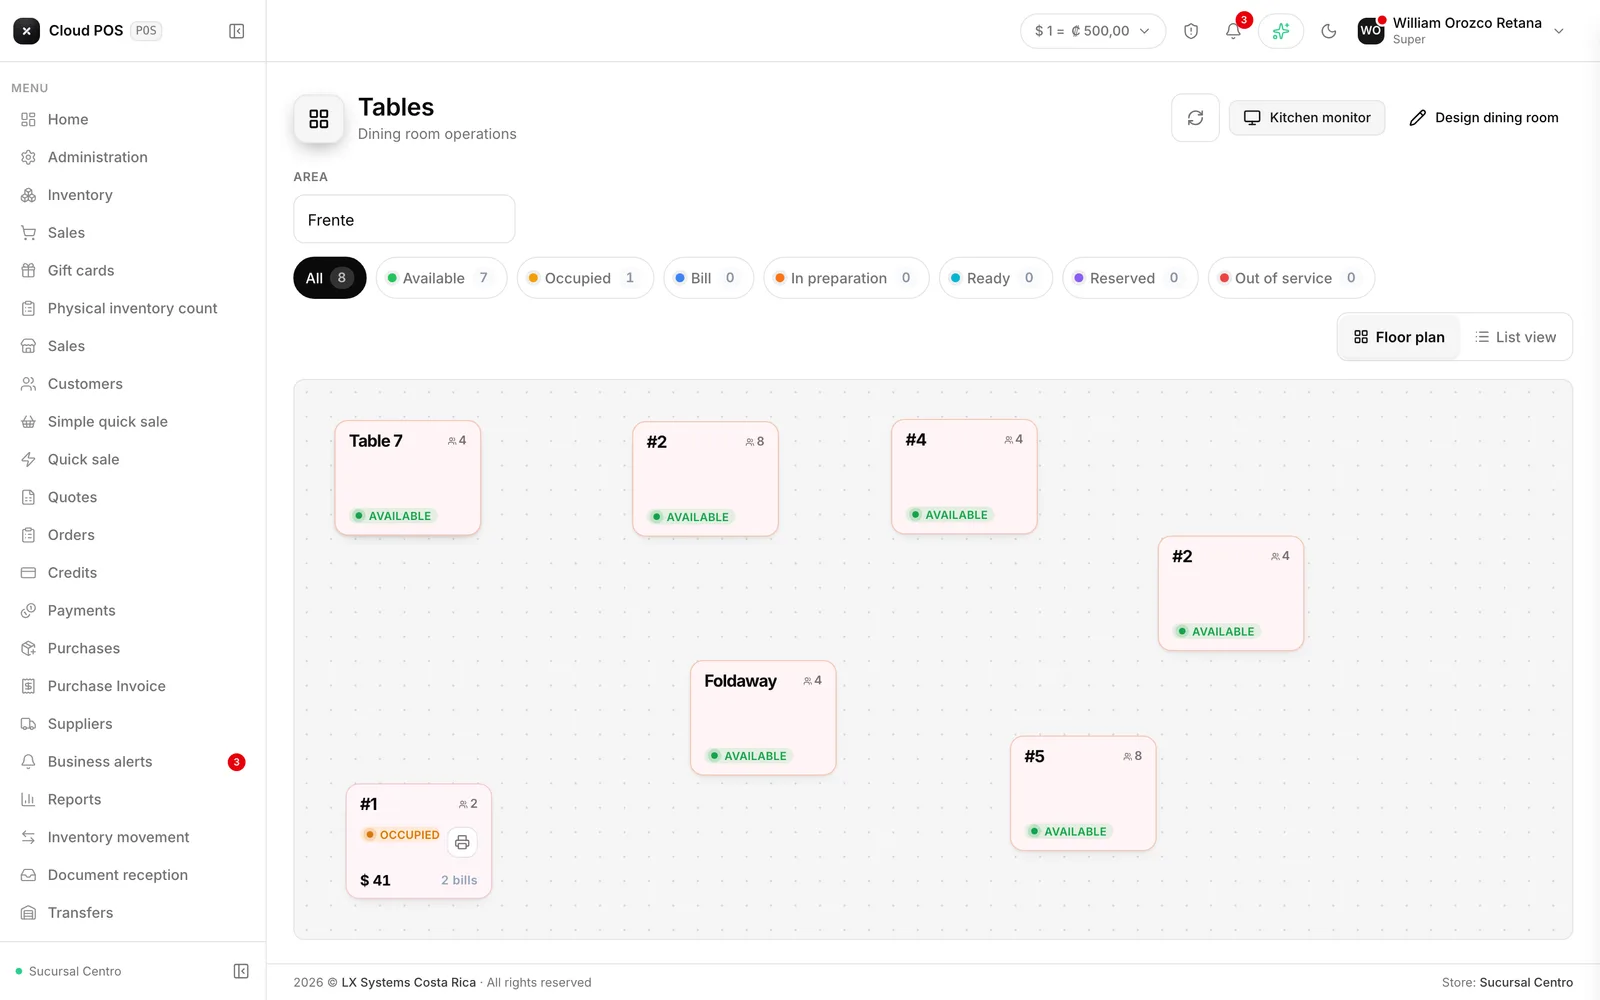
Choose the area (main dining room, patio) and you’ll see its tables. You can filter by status by tapping the chips at the top, which also tell you how many tables are in each one.
There are two views, and the system remembers the one you prefer:
- Floor plan — each table in its real physical spot. Good for finding your way around the dining room.
- List — cards in a grid, more comfortable on small screens, with buttons that go straight to Order and Bill.
Each table shows its capacity, the running total, and a timer counting from when the tab opened, which changes color as time passes. If the table has more than one open tab at the same time — groups that arrived separately — it shows how many tabs there are instead, and the system asks which one you mean when you come in.
The dining room updates on its own. No need to reload: when the kitchen marks a dish ready or a tab closes, the screen finds out on its own.
The kitchen monitor
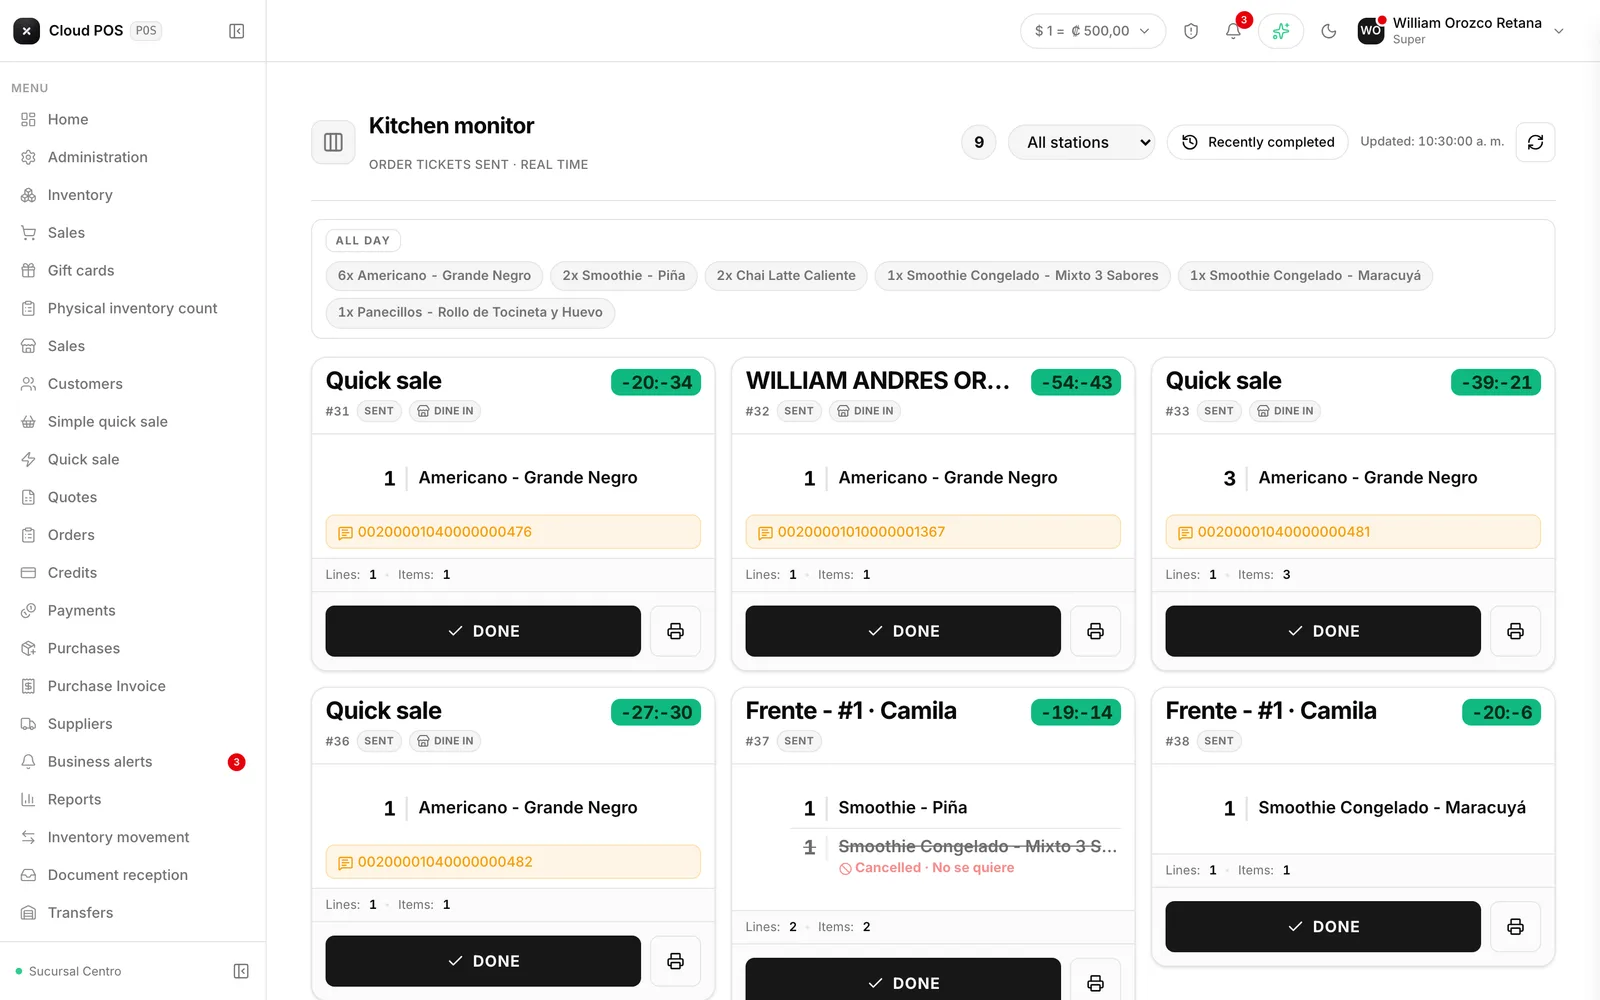
This is the screen that stays on in the kitchen. It shows the orders sent in, oldest first, each with its own timer. When a dish is ready, you tap READY and it drops off the wall.
Details that come in handy during a shift:
- A tone sounds when a new order comes in.
- The “All Day” bar adds up how many units of each product are pending in total, so you can prepare by batch instead of dish by dish.
- Recently ready lets you reopen an order if it got marked ready by mistake.
- Allergies show up marked in red on the product.
- If the business has a separate bar and kitchen, each screen can filter to its own station and see only what’s theirs.
Things worth knowing
You have to design the dining room first. If the areas and tables were never created, the dining room shows up empty. You do it once: create the areas, add the tables by dragging them into position, and set their capacity. It saves on its own.
Stations only matter if you prepare in more than one place. If everything comes out of a single kitchen, don’t touch that screen — it changes nothing. If you have a bar, create “Kitchen” and “Bar,” and assign the drink categories to the bar. The first active station by order is the one that receives anything with no station assigned.
A “remove” modifier group never charges. “No onion” is a note for the kitchen. “Add” ones can charge, if the option is linked to a product with a price.
This turns on per store. Whether a register generates kitchen orders is a store setting, not a user setting. If a coworker sees the tables and you don’t, check with your business administrator.
Creating tables and opening tabs depends on a permission. If you see the buttons grayed out, your role doesn’t have it enabled.